
Learning how to draw Naruto is a fun way to practice anime drawing. Start with simple shapes and light lines. Build the character one part at a time. Focus on the head, hair, and facial features first. Then slowly add the outfit and other details. Take your time and enjoy the drawing process as your sketch begins to take shape.
These Easy Naruto Drawings are simple to follow and perfect for beginners. Each image shows how the character develops from a basic sketch into a complete drawing. Look closely at the shapes and details as you draw.
Let’s Start Simple Naruto Drawing Made Easy
Let’s start a Naruto Drawing in a fun and easy way. We will look at simple images and see how basic shapes come together to create the character. Keep your lines light, take your time, and enjoy the process as your drawing begins to take shape.
Now let’s explore Naruto Drawings that are easy to follow just by looking at the pictures. Watch how each part is added step by step, from the hair and face to the outfit and details. You can follow the shapes or add your own creative touch. Let’s draw Naruto and have fun learning together!
Step 1: Draw the Hair

Begin by drawing Naruto’s spiky hair at the top of the page. Keep the spikes light and evenly shaped. This simple outline will help create the character’s iconic hairstyle.
Step 2: Draw the Face
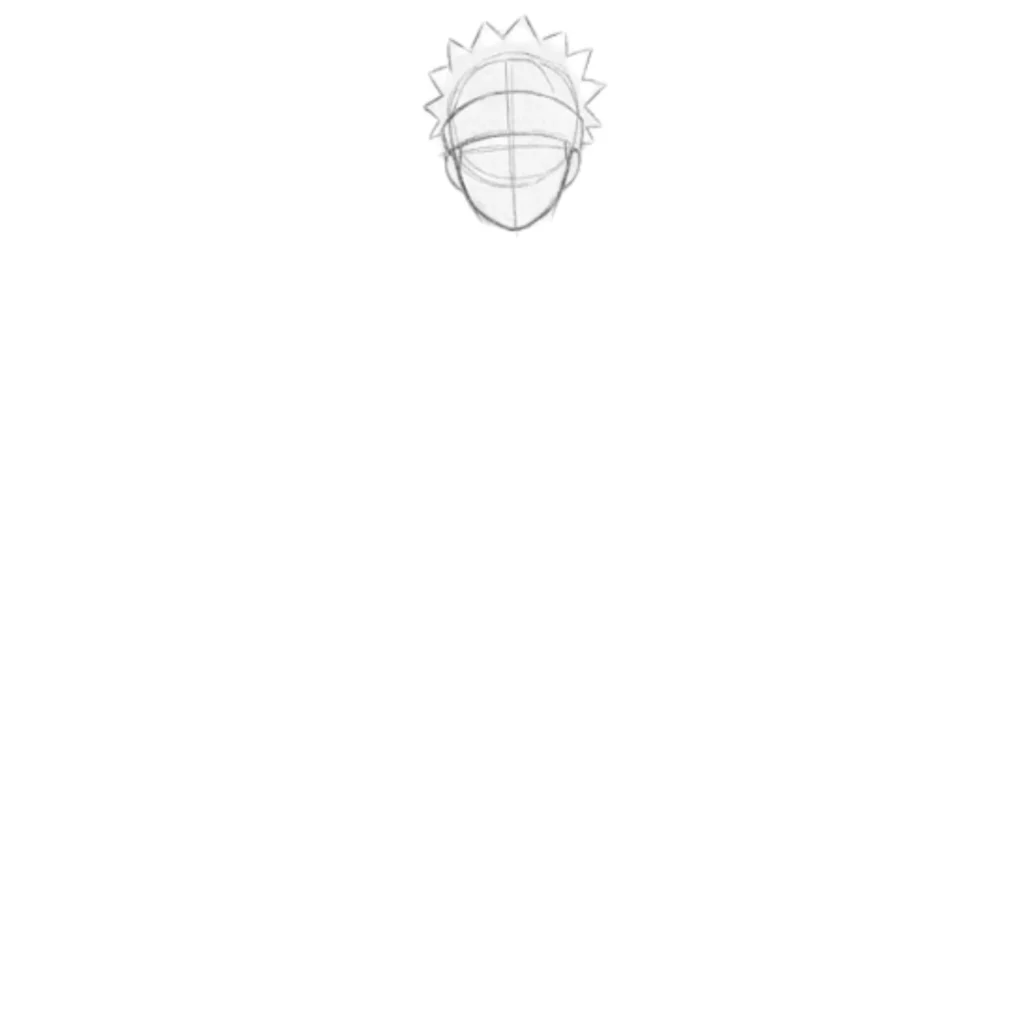
Sketch the face below the hair using a rounded shape. Add light guidelines to help place the eyes, nose, and mouth later. Keep the lines soft so you can make adjustments as you draw.
Looking for a fun and simple character sketch? Learn how to draw an Among Us crewmate using easy shapes and beginner-friendly steps. Perfect for kids and gaming fans.
Among Us DrawingStep 3: Draw the Collar
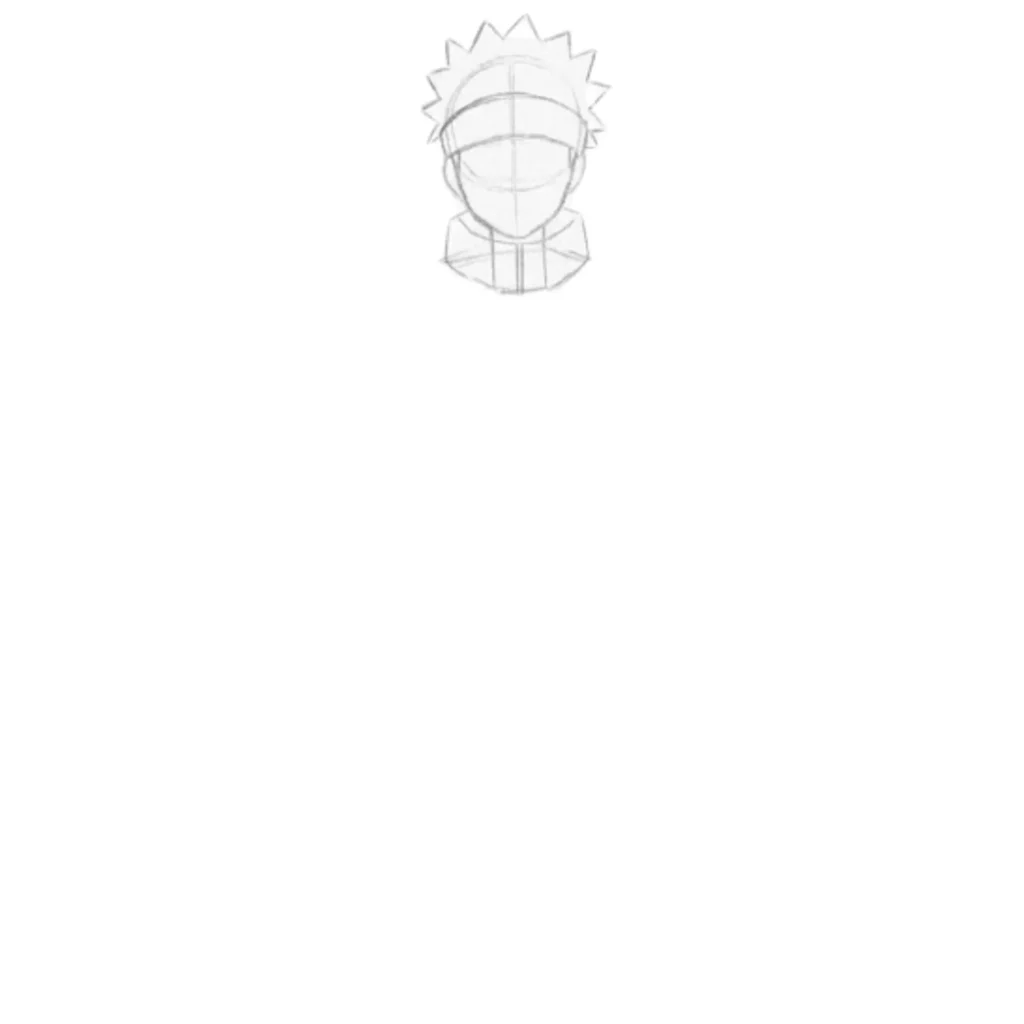
Draw Naruto’s high jacket collar beneath the face. Use simple curved lines to shape the collar evenly on both sides. This part helps define the character’s outfit and overall appearance.
Step 4: Draw the Chest

Extend the drawing downward by sketching the upper body and jacket. Keep the shapes simple and focus on the basic form. This step creates the foundation for the arms and clothing details.
Looking for a fun character sketch? Learn how to draw Mickey Mouse with simple shapes and easy techniques. This beginner-friendly lesson is perfect for kids and cartoon fans.
Simple Mickey Mouse DrawingStep 5: Draw the Hands
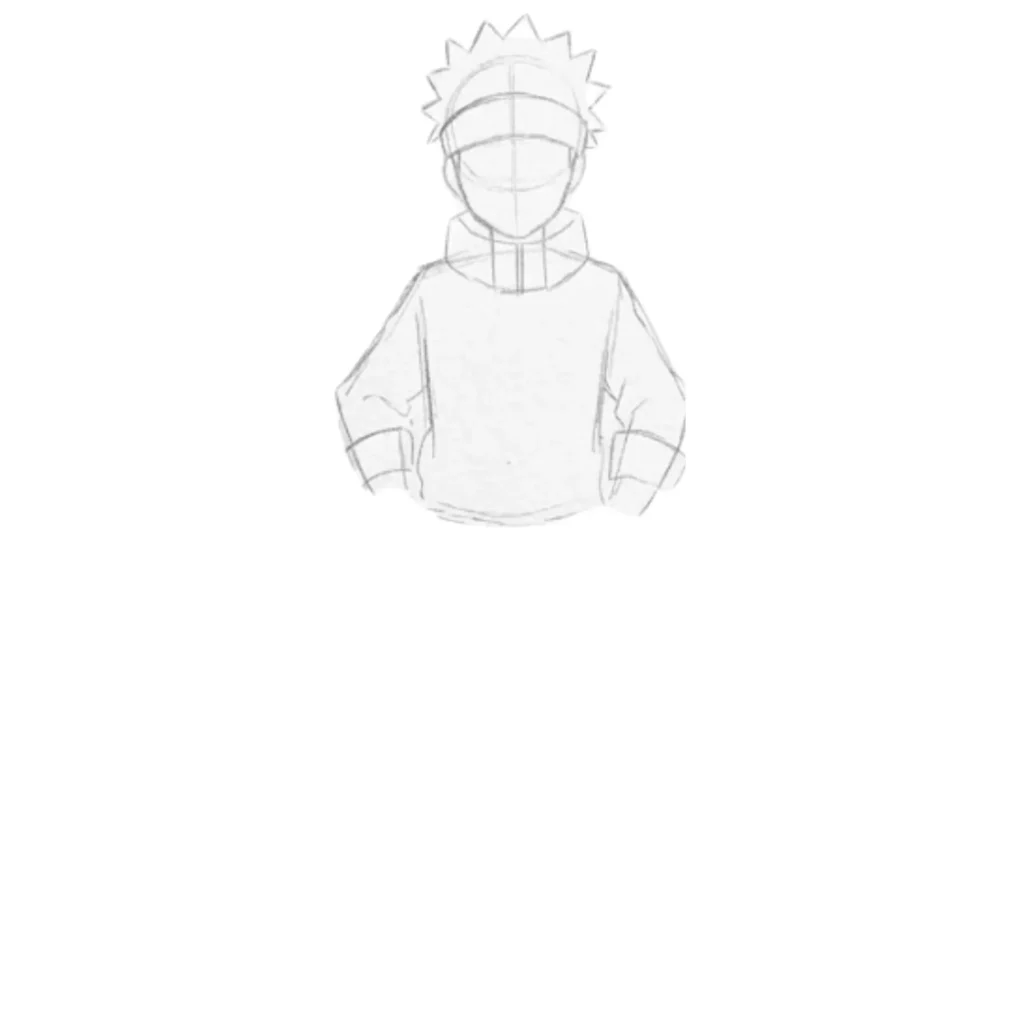
Add the sleeves and hands on each side of the body. Start with simple shapes for the fingers and palms. Focus on the overall position and size rather than drawing every detail right away.
Step 6: Draw the Wrists
Refine the sleeves and connect them smoothly to the hands. Adjust the wrist areas and clothing folds as needed. This step helps the arms look more natural and balanced.
Looking for a fun holiday drawing project? Learn how to draw the Grinch with simple shapes and easy techniques. This beginner-friendly lesson is great for kids and Christmas art lovers.
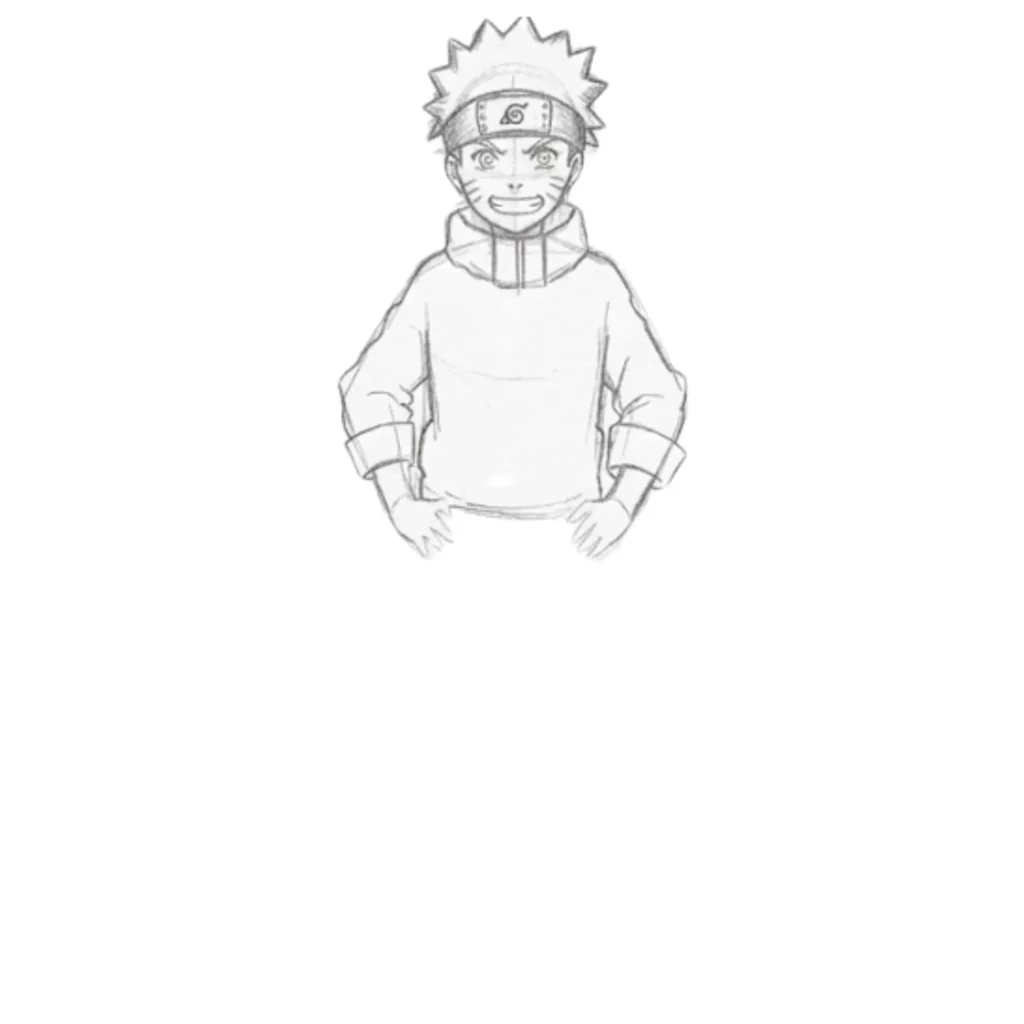
Grinch Character DrawingStep 7: Fill Details
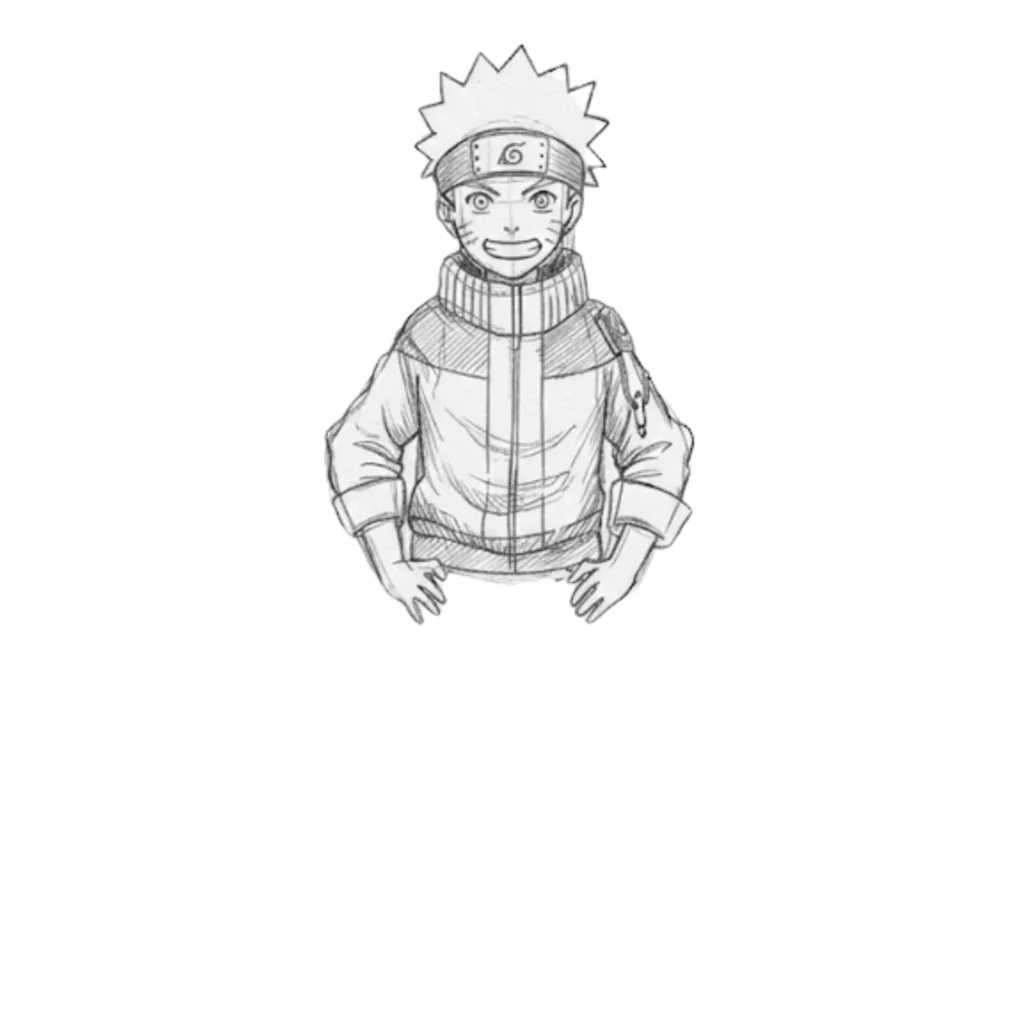
Add Naruto’s facial features, forehead protector, jacket patterns, and clothing folds. Include small details that make the character recognizable while keeping the drawing neat and clean.
Step 8: Draw Legs and Final Details
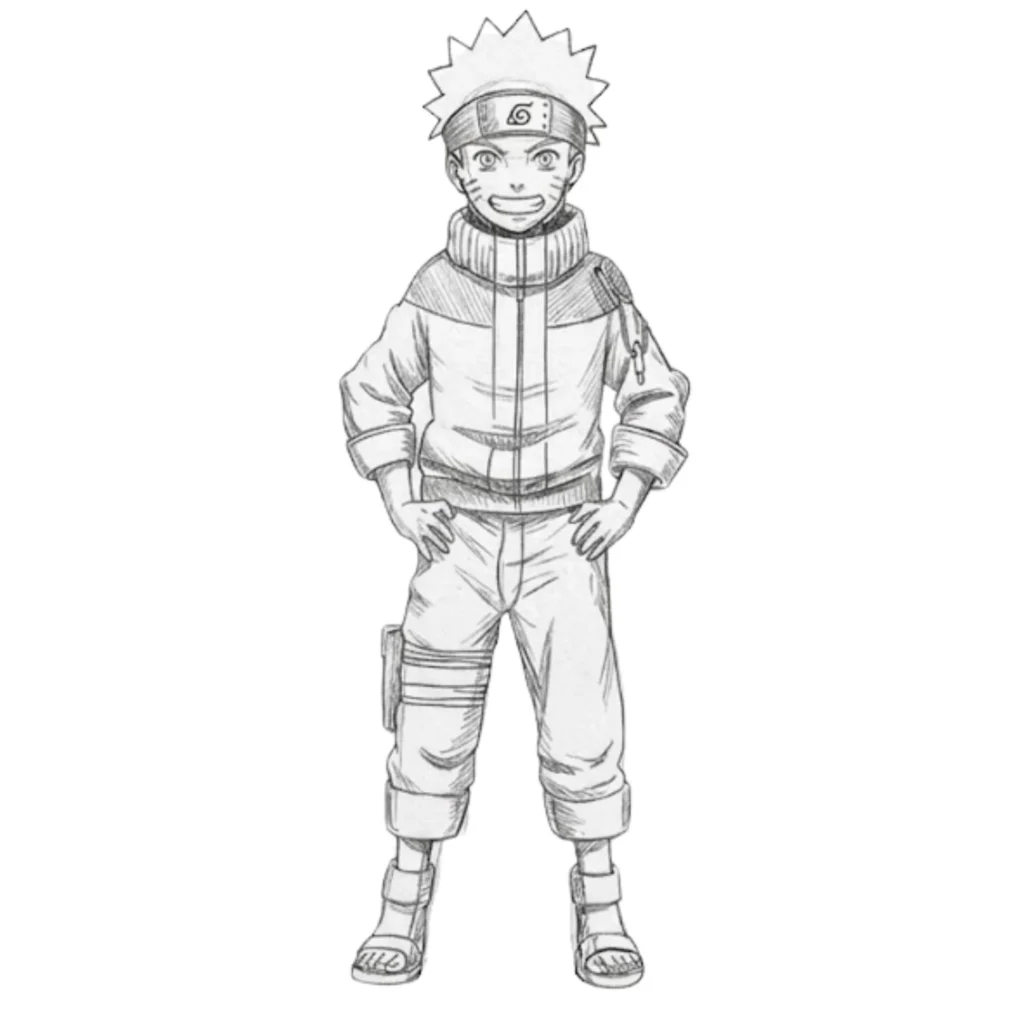
Complete the lower body by drawing the pants, legs, and sandals. Finish any remaining outfit details and darken the final lines. Erase extra sketch marks to clean up the drawing.
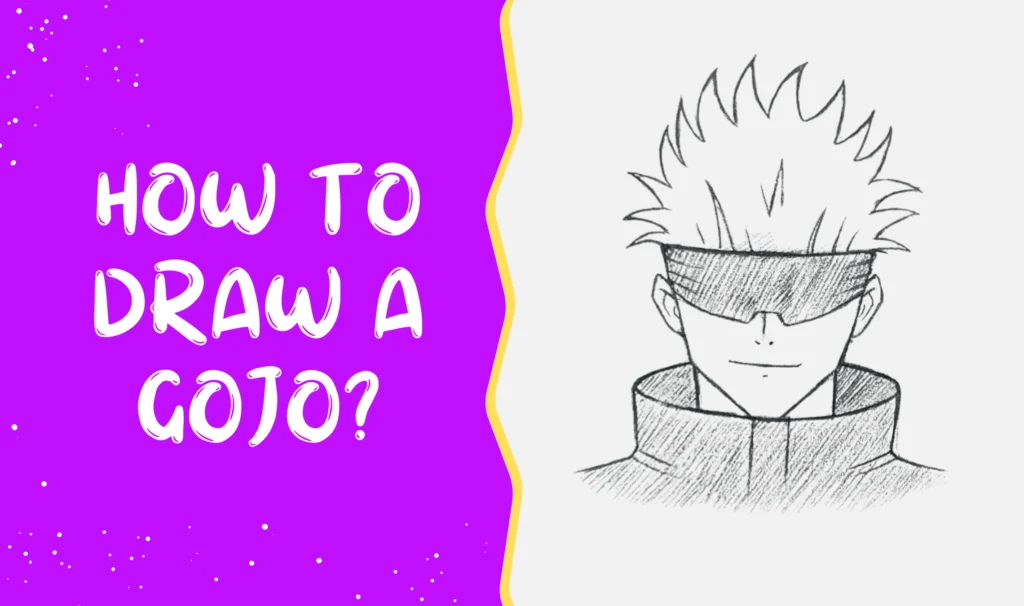
Ready to draw an anime legend? Learn how to draw Gojo with simple shapes and clean lines. This easy tutorial helps beginners create an iconic Jujutsu Kaisen character.
Beginner-Friendly Gojo DrawingConclusion: Finish Your Naruto Drawing
Great job finishing your Naruto sketch! You learned how to draw Naruto using simple shapes and easy lines. By following each image carefully, you created a fun anime character that is easy to recognize and enjoyable to draw.
These Naruto drawings show that anime art can be simple and fun for beginners. Keep practicing, explore different poses, and add your own creative touches. The more you draw, the more your skills, creativity, and confidence will continue to grow.
FAQ’s: Common Problems While Drawing Naruto
Why doesn’t my Naruto drawing look right?
Start with simple shapes and light lines. Focus on the basic outline first. You can always adjust the details later.
I find Naruto’s hair difficult to draw. What should I do?
Draw the hair in sections instead of all at once. Keep the spikes simple and focus on the overall shape before adding details.
My Naruto drawing looks messy. How can I fix it?
Use light sketch lines at the beginning. Once everything looks correct, trace the final lines and erase the extra marks.
Why do the face features look uneven?
Try using light guidelines for the eyes, nose, and mouth. This helps keep the features balanced and in the right position.
How can I make my Naruto Drawings more interesting?
Add color, action poses, or a simple background. You can also draw different expressions to give your artwork more personality.