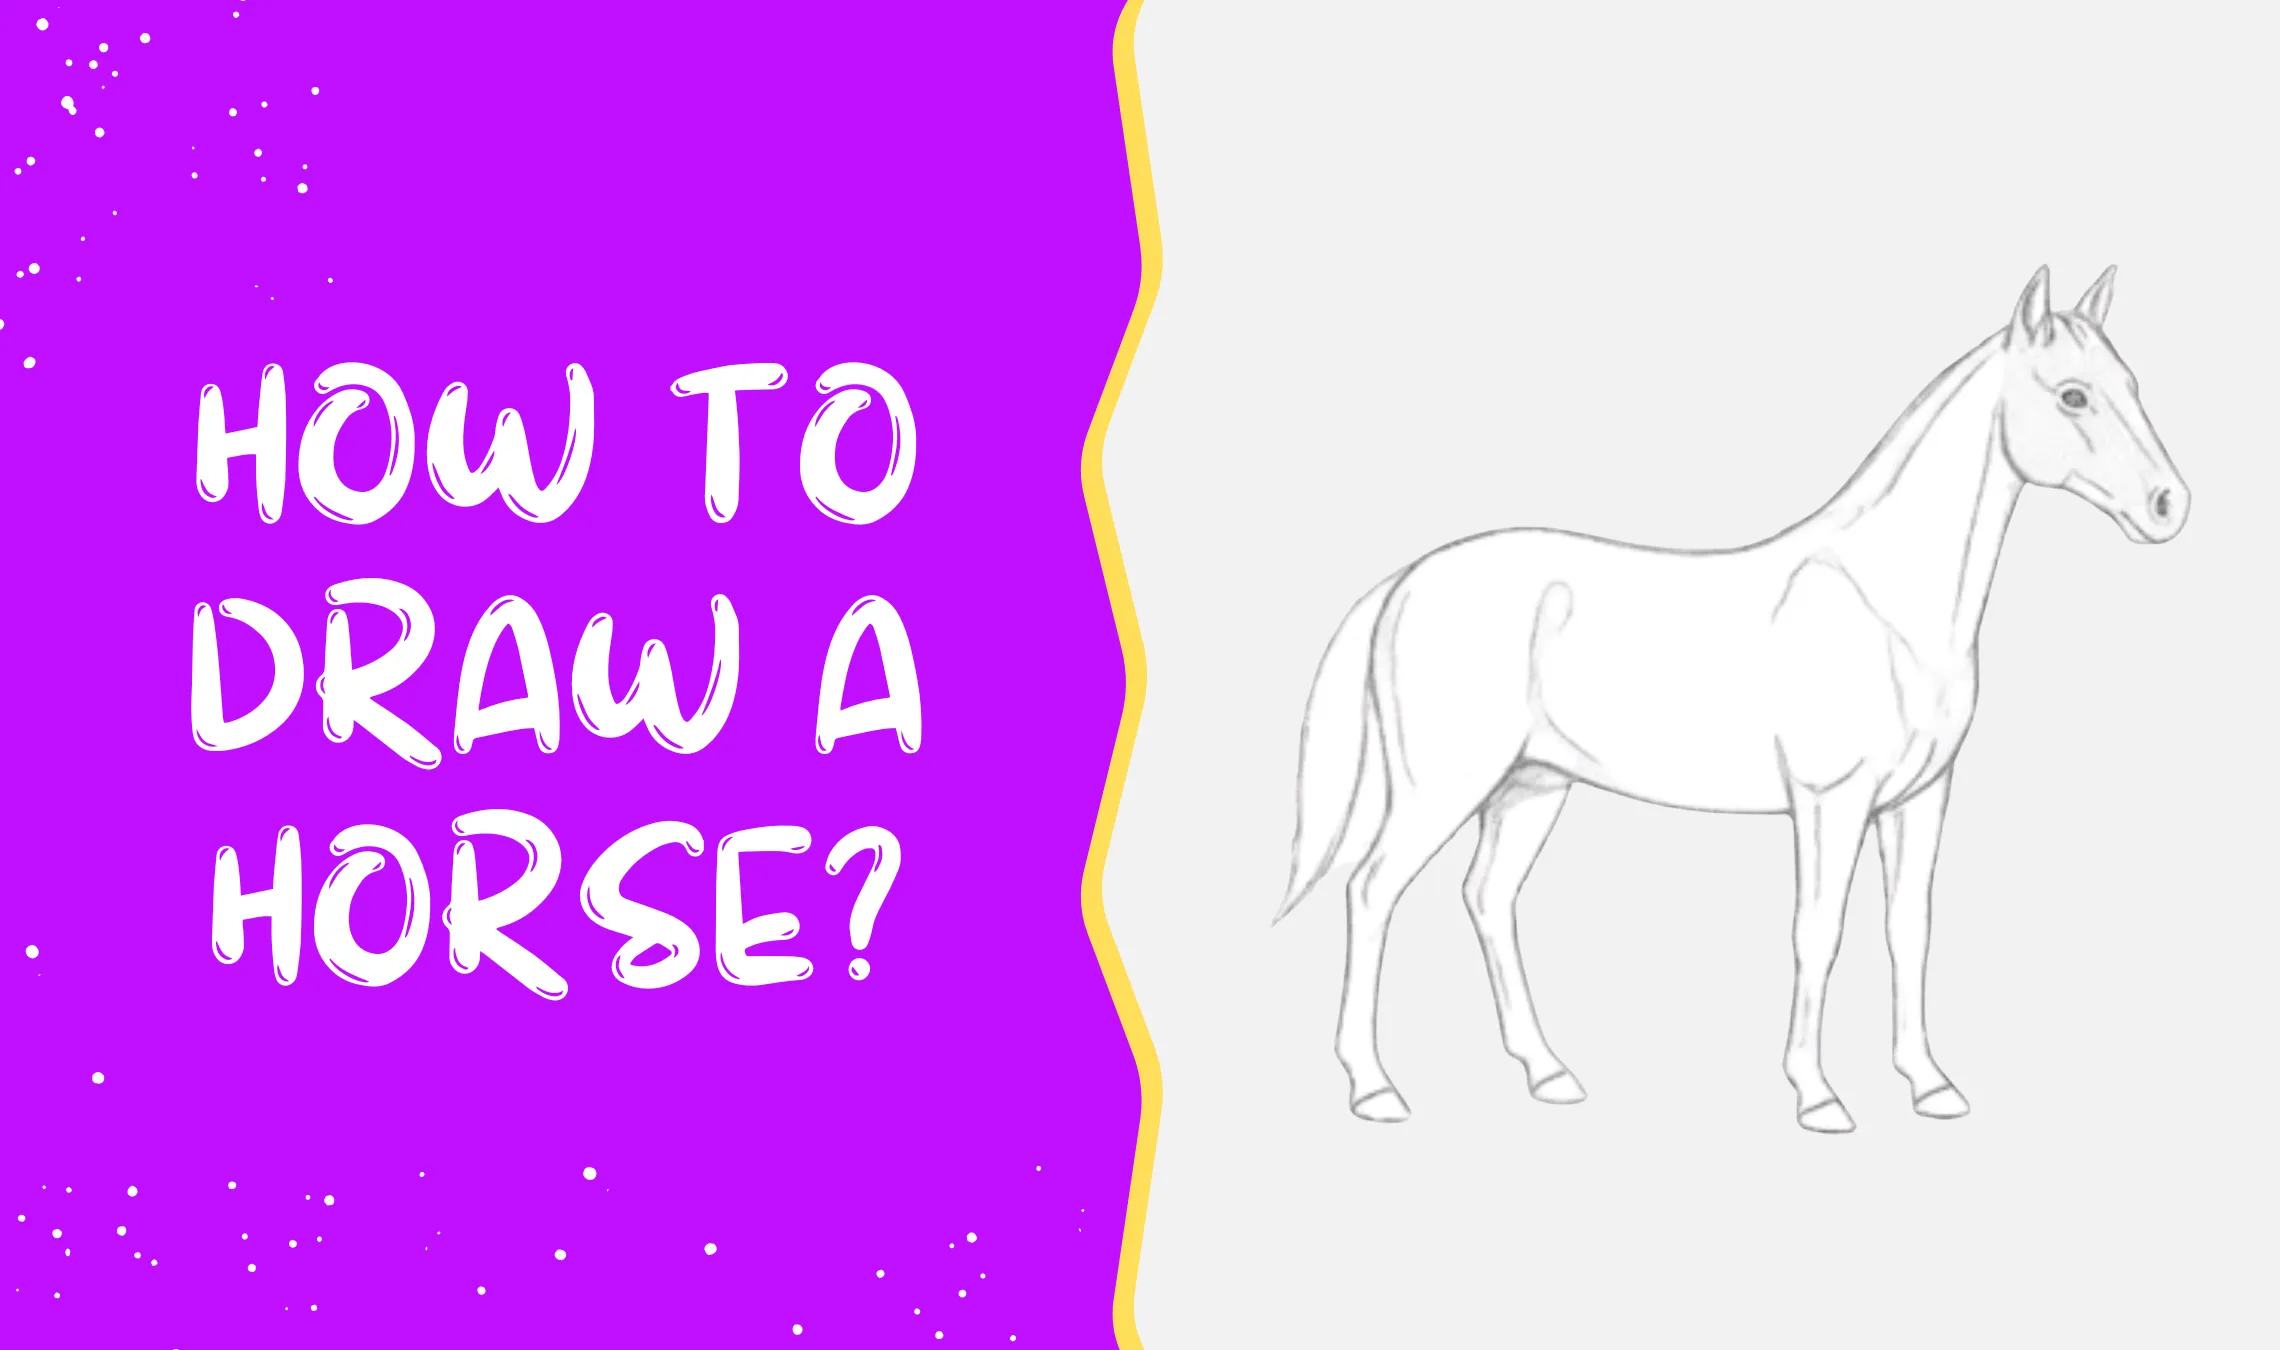
Learning how to draw a horse can be exciting when you follow simple and easy steps. These Horse Drawings use basic shapes and smooth lines to help kids create a beautiful horse without making the process difficult. It’s a fun way to improve drawing skills while enjoying a creative activity.
If you’re wondering how to draw a horse, this step-by-step guide makes everything easy to understand. Follow each stage carefully, and soon you’ll have your own horse drawing ready to color and customise however you like.
Easy Steps to Learn How to Draw a Horse
Let’s draw a horse in a fun and easy way. We’ll start with simple shapes and slowly turn them into a beautiful horse step by step. Draw lightly at first so it’s easy to make changes as you go. Take your time with each part, and enjoy watching your horse come together from basic lines and shapes.
Step 1: Draw the Basic Body Shape

Start with a large bean-like shape for the horse’s body. Then draw a small circle at the top right for the head. Connect the head and body with two smooth curved lines to form the neck.
Step 2: Outline the Horse’s Body
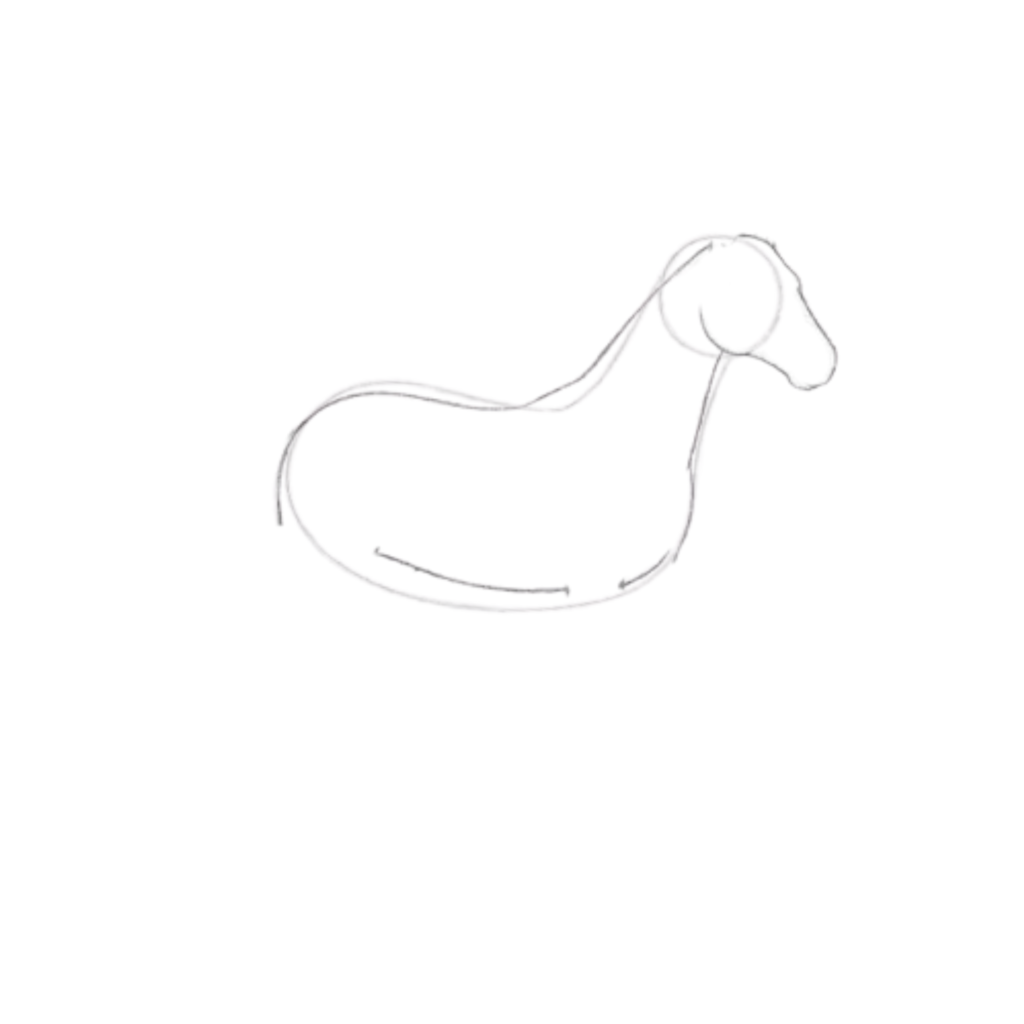
Refine the body shape and begin shaping the head. Draw the muzzle, neck, and back with smooth curves. Add a simple tail extending from the back of the body.
After drawing a monkey, try sketching a friendly dog. This simple tutorial breaks the process into easy steps, making it perfect for beginners and young artists.
Simple Dog DrawingStep 3: Add the Legs
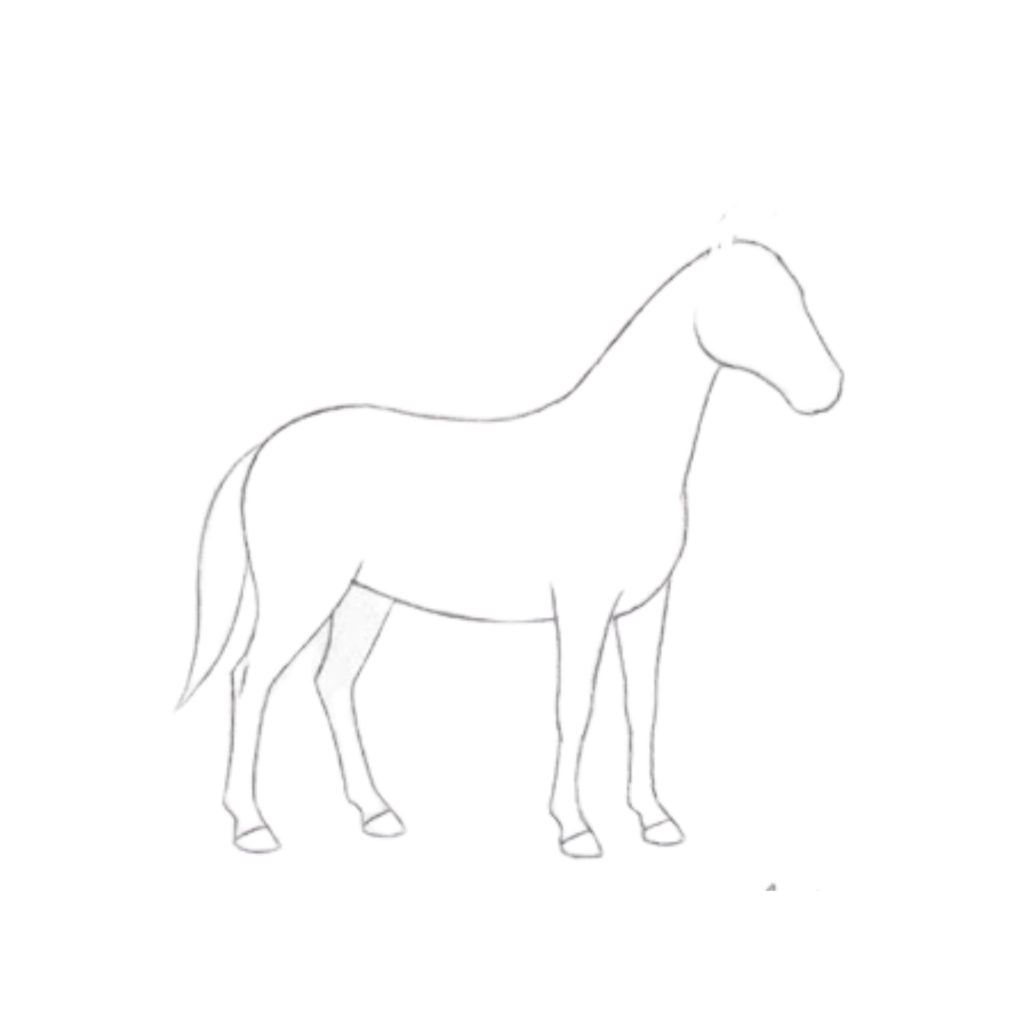
Draw four long legs beneath the body. Use simple angled lines to create the joints. Add small hoof shapes at the bottom of each leg.
Step 4: Draw the Face and Ears

Add two pointed ears on top of the head. Draw a small eye and nostril. Refine the shape of the face and neck to give the horse a more natural appearance.
If you enjoyed drawing a dog, try sketching a tiger next. Learn how to create a powerful big cat with easy shapes and simple step-by-step instructions.
Beginner-Friendly Tiger DrawingStep 5: Add Body Details
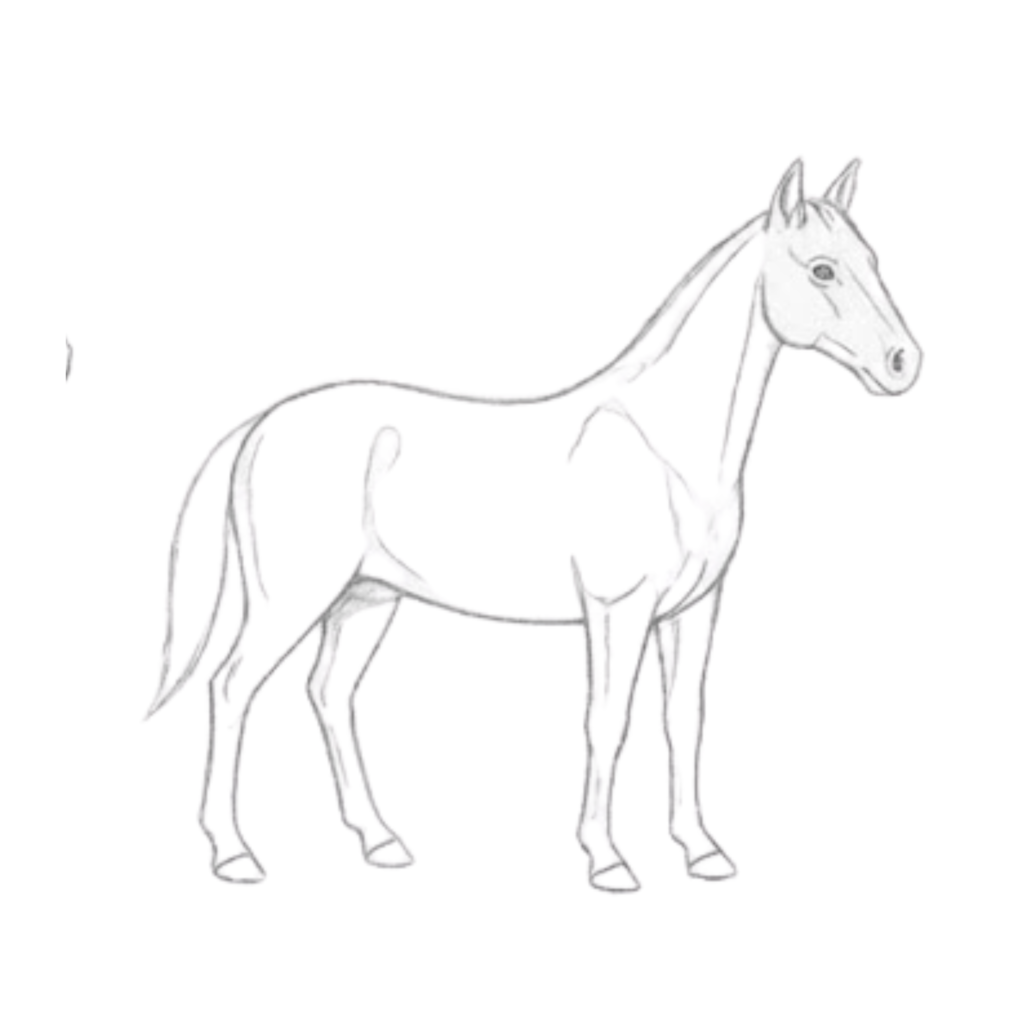
Sketch gentle muscle lines on the neck, shoulder, and body. Refine the legs and hooves. Make the tail more defined with flowing lines.
How To Draw A Horse – Preschool
Conclusion: Complete Your Horse Drawing
Great job finishing your horse! You followed simple shapes and easy steps to create a fun drawing from start to finish. Learning how to draw a horse is a great way to practice your creativity while building confidence in your drawing skills.
Keep practicing and try new ideas with your Horse Drawings. You can add colors, draw different poses, or create horses with unique styles and patterns. The more you draw, the more your skills will grow, and you’ll discover new ways to make your artwork even better! 🐴✨
FAQ’s: Common Problems While Drawing a Horse!
Q1: Why does my horse look out of proportion?
This usually happens when the head, body, or legs are not the right size compared to each other. Start with simple guide shapes and make small adjustments before drawing the final outline.
Q1: Why does my horse look out of proportion?
This usually happens when the head, body, or legs are not the right size compared to each other. Start with simple guide shapes and make small adjustments before drawing the final outline.
Q3: My horse’s face doesn’t look right. How can I improve it?
Keep the facial features simple. A small eye, a neat nose, and properly placed ears can make your horse look much more natural.
Q4: My drawing looks messy. How can I fix it?
Use light pencil strokes while sketching. After you’re happy with the shape, go over the final lines and erase any extra marks to keep your drawing clean.
Q5: How can I make my Horse Drawings look better?
Practice drawing horses in different poses and styles. You can also add details like a flowing mane, a longer tail, or fun backgrounds to make your artwork more interesting.